In this tutorial we will learn how to get the date and time from NIST TIME server using M5Stack StickC and Visuino.
Watch a demonstration video.
Step 1: What You Will Need

M5StickC ESP32: you can get it here
Visuino program: Download Visuino
Note: Check this tutorial here on how to Install StickC ESP32 board
Step 2: Start Visuino, and Select the M5 Stack Stick C Board Type
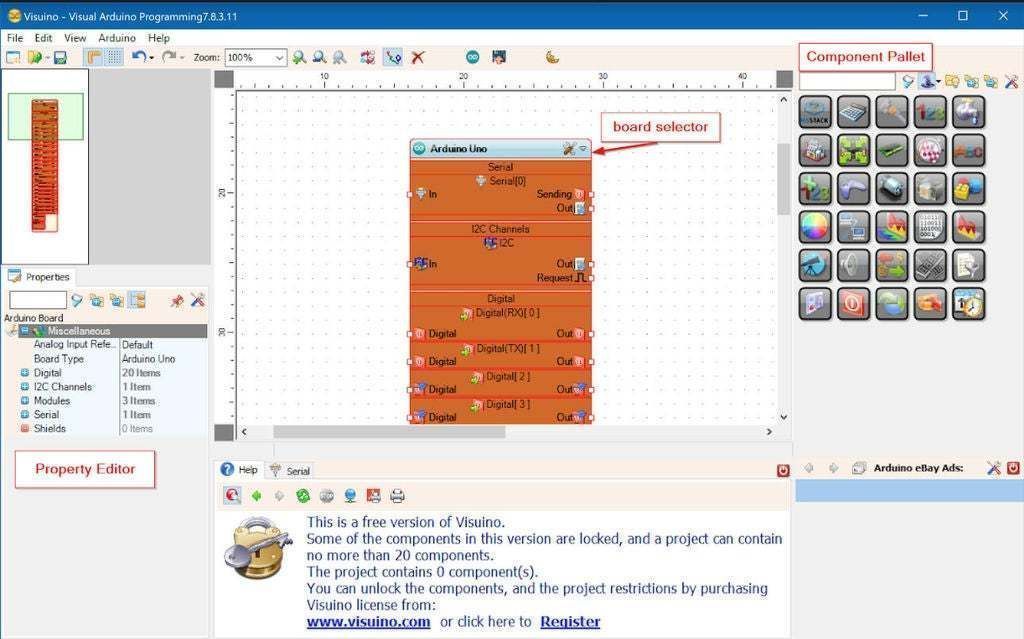
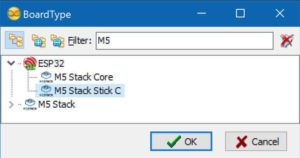
Start Visuino as shown in the first picture Click on the “Tools” button on the Arduino component (Picture 1) in Visuino When the dialog appears, select “M5 Stack Stick C” as shown on Picture 2
Step 3: In Visuino Set the StickC Board

Click on “M5 Stack Stick C” Board to select it
In “Properties” window select “Modules” and click “+” to Expand,
Select “Display ST7735” and click “+” to expand it,Set “Orientation” to “goRight”
- Set “Background Color” to “ClBlack”Select “Elements” and click on blue button with 3 dots…
Elements Dialog will show
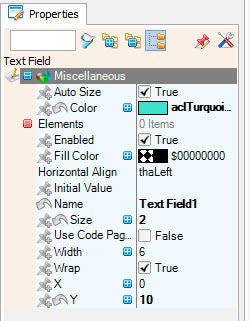
In the Elements Dialog expand “Text” on the right side and drag “Draw Text” and drag 2X “Text Field” from the right side to the left
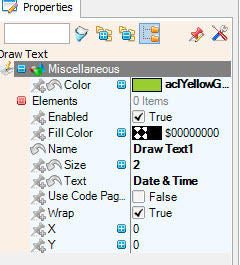
- Select “Draw Text1” text on the left and in the properties window set size to 2, color to aclLime and text to ‘Date & Time’
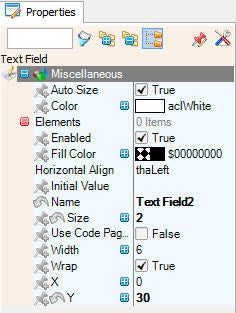
- Select “Text Field1” on the left and in the properties window set size to 2, color to aclAqua and Y to 10
- Select “Text Field2” on the left and in the properties window set size to 2 and Y to 30
Step 4: WiFi Setup

Click on “M5 Stack Stick C” Board to select it
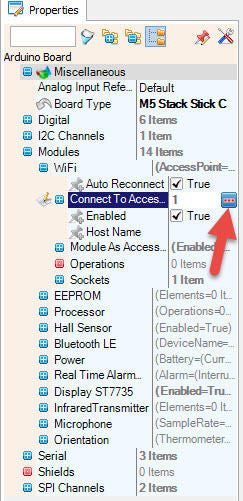
In “Properties” window select “Modules” and click “+” to Expand,”WiFi” and click “+” to Expand, Select “Connect To Access Points” and click on the button (3 dots)
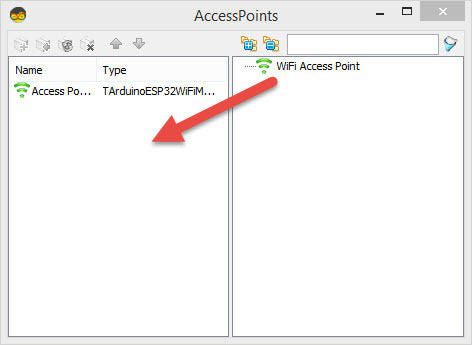
In the “AccessPoints” window drag “WiFi Access Point” to the left side.
Then on the Left side select “Access Point1” and in the properties window set
- Under “SSID” put the name of your WiFi Network
- Under “Password” put the access password for your WiFi network
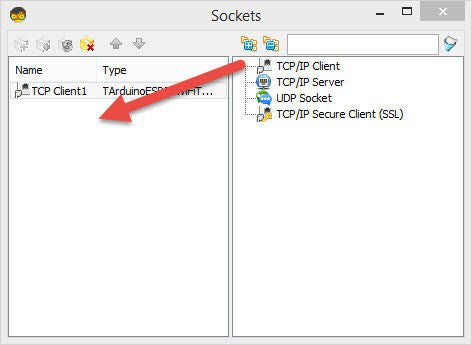
In “Properties” window select “Modules” and click “+” to Expand,”WiFi” and click “+” to Expand,>Sockets, click on […] button, so that “Sockets” window will open
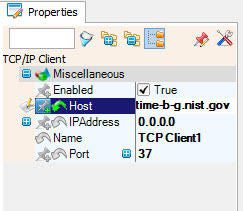
Drag the TCP Client from right to the left side and Under Properties window set
- port: 37 and
- host: time-b-g.nist.gov
Step 5: In Visuino Add Components
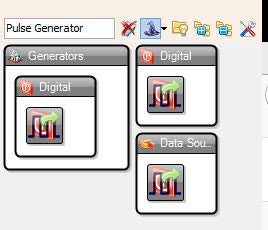

- Add “Pulse Generator” component
- Add “Internet Time Protocol” component
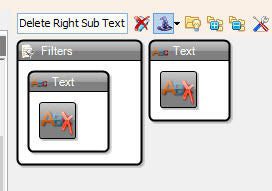
- Add 2X “Delete Right Sub Text” component
- Add 2X “Delete Left Sub Text” component
Step 6: In Visuino Set Components
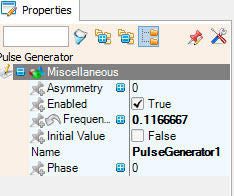

- Select “PulseGenerator1” and in the properties window set frequency to 0.1166667
- Select “DeleteRightText1” and in the properties window set Length to 13
- Select “DeleteRightText2” and in the properties window set Length to 5
- Select “DeleteLeftText2” and in the properties window set Length to 12
Step 7: In Visuino Connect Components

- Connect “PulseGenerator1” pin [Out] to “InternetTime1” pin [In]
- Connect “InternetTime1” pin [Socket] to “M5 Stack Stick C” >TCP Client1 pin [In]
- Connect “InternetTime1” pin [Out] to “DeleteRightText1” pin [In] and “DeleteRightText2” pin [In]
- Connect “DeleteRightText1” pin [Out] to “DeleteLeftText1” pin [In]
- Connect “DeleteRightText2” pin [Out] to “DeleteLeftText2” pin [In]
- Connect “DeleteLeftText1” pin [Out] to “M5 Stack Stick C”>Display ST7735>Text Field1 pin[In]
- Connect “DeleteLeftText2” pin [Out] to “M5 Stack Stick C”>Display ST7735>Text Field2 pin[In]
Step 8: Generate, Compile, and Upload the Arduino Code

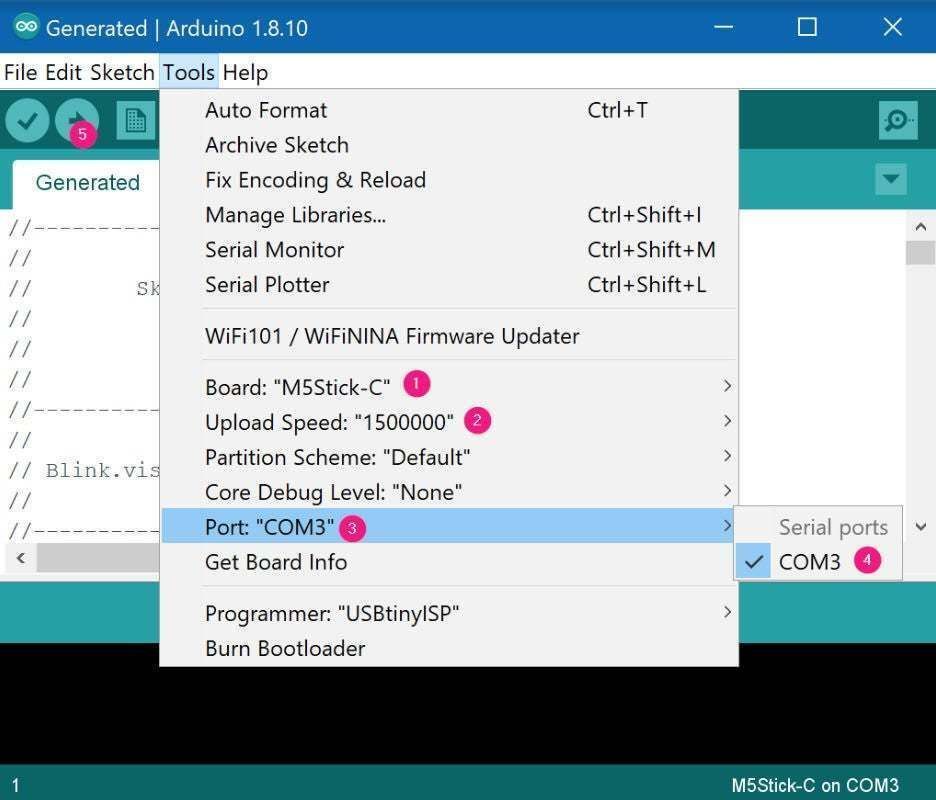
Click the Arduino icon on the toolbar, this will generate code and open the Arduino IDE. The button next to it will compile and send the code straight to the device. You will want to open the IDE the first time to make sure the COM port is set correctly. After that the Arduino IDE will save your settings.
Once in the Arduino IDE make sure your Board, Speed, and Port are set correctly. You will most likely need to set the COM port from the sub menu, but the others should be set automatically. If you have more than one COM port try removing your M5Stick, look and see which ports remain, then reattach the M5Stick and see which one returns. That is it’s COM port.
Then click Upload. This will Verify (compile) and Upload.
Step 9: Play
If you power the M5Sticks module, it will connect to the internet and the display should start showing the date and time from the NIST server
.You can also experiment with other servers that you can find here https://tf.nist.gov/tf-cgi/servers.cgi
Congratulations! You have completed your M5Sticks project with Visuino. Also attached is the Visuino project, that I created for this Instructable, you can download it here. You can download and open it in Visuino: https://www.visuino.eu
Read Full tutorial here.